
Documentation
Everything you need to know about SnapFrame — from installation and capture to editing, export, and licensing.
All
topics
Browse documentation by category. Expand a section to jump to a topic.
Getting Started
Capturing
Editing
Export & Sharing
Integrations
Account & Licensing
Help & Troubleshooting
Getting Started
Installation
Install SnapFrame takes less than a minute. You add it directly from the Chrome Web Store, confirm the permissions it needs, and then pin the icon to your toolbar so it's always one click away.
Install Steps
- Visit the Chrome Web Store — Open chrome.google.com/webstore in your Chrome browser and search for SnapFrame — Full Page Screenshots, or follow a direct installation link from the SnapFrame website.
- Add to Chrome — On the SnapFrame store listing, click the Add to Chrome button. A dialog will appear listing the permissions SnapFrame requires. Review them and click Add extension to confirm.
- Confirm permissions — Chrome will notify you that SnapFrame has been installed. The permissions dialog may appear briefly.
- Pin SnapFrame to your toolbar — Click the Extensions puzzle-piece icon (⊞) in the Chrome toolbar, find SnapFrame in the list, and click the pin icon next to it. The SnapFrame icon will appear in your toolbar, ready to use on any tab.
Permissions Explained
| Permission | Why SnapFrame needs it |
|---|---|
Active Tab (activeTab) | Lets SnapFrame read and scroll the page you're currently viewing so it can capture its full contents. |
Scripting (scripting) | Allows SnapFrame to inject its capture engine into the page — this is how it scrolls, stitches frames, and highlights elements. |
Storage (storage) | Saves your screenshot temporarily while it's being transferred from the capture step to the editor tab. Nothing is sent to external servers during capture. |
Unlimited Storage (unlimitedStorage) | Allows SnapFrame to store large, high-resolution captures in local browser storage without hitting Chrome's default storage cap. |
Host permissions (<all_urls>) | Required so SnapFrame can work on any website you visit, not just a fixed list of domains. |
Restricted Pages
SnapFrame cannot capture certain internal browser pages. If you try to open the popup on one of these pages, you'll see a friendly "Restricted Page" error instead of the capture options.
Pages that cannot be captured:
chrome://— Chrome's internal settings and special pageschrome-extension://— Pages served by Chrome extensions themselvesedge://— Microsoft Edge's internal pagesabout:— Browser about pages (e.g.about:blank)- Chrome Web Store (
chromewebstore.google.com) — Store policy prevents extensions from capturing Web Store pages
Quickstart
Go from zero to a finished, exported screenshot in four steps — open the popup, capture a full page, annotate in the editor, and download your image.
Capture, Edit, and Export
- Open the SnapFrame popup — Navigate to any webpage you want to capture, then click the SnapFrame icon in your Chrome toolbar. The popup opens with five options: Capture Full Page, Capture Visible Area, Draw Region, Pick Element, and Workspace.
- Start a capture — Click Capture Full Page (or press Alt+S). SnapFrame will begin auto-scrolling the page from top to bottom, stitching each frame together as it goes. You'll see a live progress bar and a percentage counter in the popup while the capture runs.
- Edit in the editor — When the capture is complete, the editor opens automatically in a new tab. The full stitched image appears on the canvas, ready for editing. Try out the tools in the annotation toolbar at the bottom of the screen.
- Export your screenshot — When you're happy with the result, use the Export format dropdown in the top toolbar to choose your format (JPG or WebP on the free tier; PNG and PDF on Pro), then click Download or Copy. Your file will be saved to your default downloads folder, automatically named
SnapFrame-<timestamp>.
Keyboard Shortcuts
SnapFrame is designed to stay out of your way, and its keyboard shortcuts let you trigger captures and control the editor without ever reaching for the mouse.
Capture Shortcuts
These shortcuts work while you are on any regular webpage in Chrome. They do not require the SnapFrame popup to be open.
| Shortcut | Action |
|---|---|
Alt+S | Capture the full page immediately, without opening the popup |
Alt+V | Capture only the visible viewport — no scrolling or stitching |
Alt+R | Start Draw Region mode — drag a rectangle to capture any area |
Escape | Stop a capture that is in progress, cancel Draw Region, or cancel the Element Picker |
Editor Shortcuts
Once a capture opens in the SnapFrame editor, the following shortcuts control zoom and history.
| Shortcut | Action |
|---|---|
Ctrl+Z | Undo the last edit (up to 50 steps) |
Ctrl+Y or Ctrl+Shift+Z | Redo the last undone edit |
Ctrl+= or Ctrl++ | Zoom in |
Ctrl+- | Zoom out |
Ctrl+0 | Reset zoom to fit the screen |
Ctrl+Scroll | Zoom in or out with the mouse wheel |
Ctrl with Cmd for all editor shortcuts. Capture shortcuts use Option instead of Alt (Option+S, Option+V, Option+R). Rebind any shortcut at chrome://extensions/shortcuts.Capturing
Full-Page Screenshots
Auto-scroll any webpage and stitch every visible frame into one seamless, high-fidelity tall image — no manual scrolling required.
How to Capture a Full Page
- Open the SnapFrame popup by clicking the SnapFrame icon in your Chrome toolbar.
- Select the Capture Full Page action card. The popup switches to the progress view and begins capturing immediately.
- A status label, progress bar, and percentage counter update in real time as SnapFrame scrolls and stitches each section of the page.
- When the capture finishes, the popup closes automatically and your screenshot opens in the SnapFrame editor in a new tab.
Stopping a Capture in Progress
If you need to cancel a capture after it has started, you have two options:
- Click the Stop Capturing button in the popup progress view.
- Press Escape on your keyboard.
What SnapFrame Handles Automatically
You don't need to prepare the page before capturing. SnapFrame takes care of common layout issues on its own:
| Scenario | What SnapFrame does |
|---|---|
| Sticky or fixed headers and footers | Detects and handles them so they don't repeat across every frame |
| Browser scrollbars | Hidden during capture so they don't appear in the final image |
| CSS and JavaScript animations | Frozen at capture time to prevent blurring or ghosting |
| Inner scroll containers (e.g. chat apps, SPA layouts) | Unrolled so their full content is included in the screenshot |
Visible Area Capture
Capture only what's currently on screen — no scrolling, no stitching. Perfect for above-the-fold shots, dashboards, or any time you need a quick viewport screenshot.
How to Capture the Visible Area
- Open the SnapFrame popup and select Capture Visible Area, or press Alt+V (
Option+Von Mac) on any regular webpage. - SnapFrame takes a single screenshot of the current viewport and opens it in the editor immediately — no progress bar or multi-frame stitching.
Alt+S) instead.Draw Region
Drag a freeform rectangle anywhere on the page to capture exactly the area you need — not tied to DOM elements. Ideal for partial screenshots, UI snippets, or irregular selections.
How to Draw a Region
- Open the SnapFrame popup and select Draw Region, or press Alt+R (
Option+Ron Mac). - A crosshair overlay appears on the page. Click and drag to draw a rectangle around the area you want.
- Release to capture. SnapFrame crops the viewport screenshot to your selection and opens it in the editor.
- Press Escape at any time to cancel without capturing.
Single Element Picker
Hover over any page element to highlight it with a blue overlay, then click to capture just that component — no cropping required afterward.
How to Pick and Capture an Element
- Click the SnapFrame icon in your Chrome toolbar to open the popup.
- Select the Pick Element action card. The popup minimises and the Element Picker activates on the current page.
- Move your cursor over the page. A blue overlay appears around whichever element is currently under your pointer. A label just above the overlay shows the element's CSS selector.
- When the blue overlay is on the element you want, click it. SnapFrame captures that element's exact bounds and sends the result to the editor in a new tab.
Good Use Cases
- Grabbing a data chart or graph from a dashboard without surrounding UI
- Capturing a navigation bar or header for design reference
- Isolating a product card from a listing page
- Snipping a hero section or call-to-action banner
- Pulling out a specific form, modal, or sidebar component
Workspace (Upload & Edit)
Launch a blank SnapFrame editor canvas and load your own PNG, JPG, or WebP image to edit using the full suite of SnapFrame annotation tools.
How to Open Workspace
- Click the SnapFrame icon in your Chrome toolbar to open the popup.
- Select the Workspace action card. A new tab opens with a blank SnapFrame editor canvas.
- You have two options to load an image onto the canvas:
- Drag and drop a PNG, JPG, or WebP file directly onto the canvas area.
- Click to browse and select a file from your computer using the file picker.
- Once your image loads, the full set of SnapFrame editing tools becomes available — annotations, crop, social resizer, captions, rounded corners, and more.
What You Can Do Once an Image is Loaded
All editing tools work exactly the same as they do on a captured screenshot:
- Annotate with the pen, marker, shapes, arrows, text labels, and blur/redact tool
- Crop in freeform, 16:9, or 4:3 modes
- Resize for social, print, or email formats using the Social Resizer
- Add a caption bar with source label and custom text
- Apply rounded corners with the corner-radius slider
- Export as JPG or WebP (free, unlimited) or PNG / PDF (Pro)
Editing
Annotations (Text, Shapes, Blur)
Draw, highlight, and label your screenshots using SnapFrame's annotation toolbar — shapes, freehand pen, text, blur, undo, and more.
Annotation Tools at a Glance
| Tool | What it does |
|---|---|
| Select / Move | Click an existing annotation to select it; drag to reposition it anywhere on the canvas. |
| Pen | Draw freehand lines and strokes in any shape. |
| Marker | Apply a semi-transparent highlighter stroke over content. |
| Rectangle | Draw a rectangular outline. |
| Circle | Draw a circular or elliptical outline. |
| Arrow | Draw a straight arrow pointing to a specific element. |
| Text | Place an editable text label on the screenshot. |
| Numbered Steps | Place auto-incrementing callouts (1, 2, 3…) with optional connector lines — ideal for SOPs and bug repro steps. |
| Redact & Blur | Apply mosaic pixelation, a solid color box, or a proportional blur to obscure sensitive areas. Auto-redact PII via on-device heuristics (Pro). |
Numbered Steps
Select the Numbered Steps tool, then click on the screenshot to place sequential callouts. Steps auto-increment as you add them. Drag a step to reposition it. From the step panel you can toggle dashed connector lines between steps. Deleting a step renumbers the remaining ones automatically.
Text Tool
Select the Text tool from the annotation toolbar, then click anywhere on the image to place a text label. A formatting panel opens in the sidebar with the following options:
- Font family — choose from Inter (clean and modern), Shantell Sans (casual handwritten feel), or Geist (monospaced/developer aesthetic).
- Font size — adjust with the slider from small captions to large callouts.
- Bold / Italic — toggle either style independently.
- Color — pick from 7 preset color swatches (red, blue, green, amber, purple, black, white).
- Delete Text — remove the selected text annotation entirely.
Redact & Blur
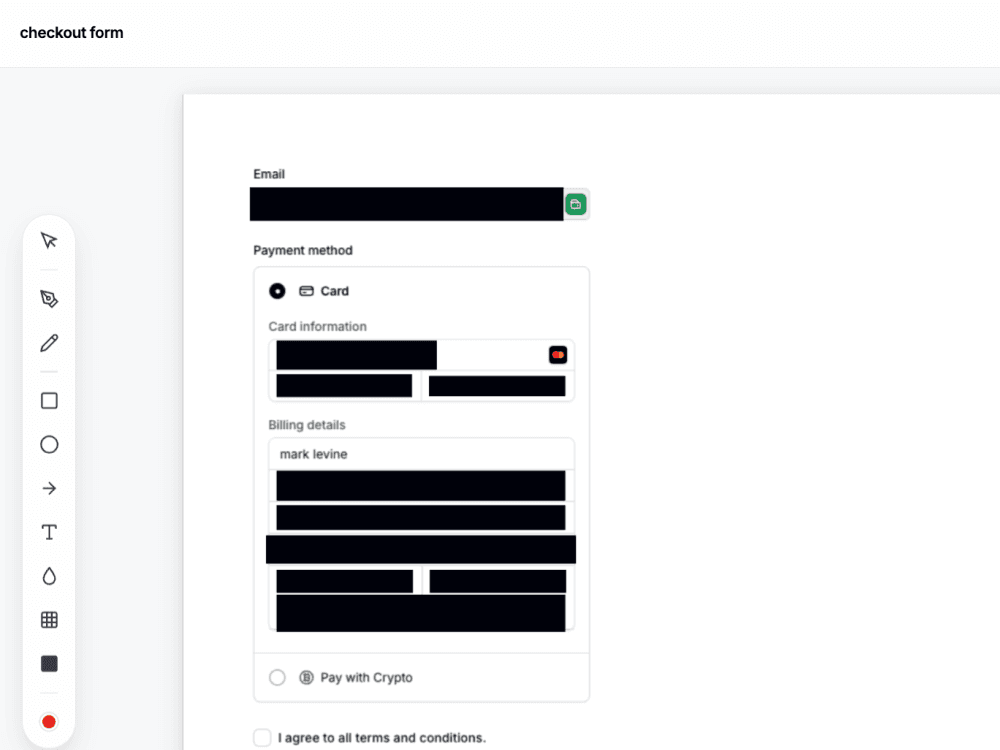
SnapFrame provides both manual and automatic tools to redact sensitive data before you attach screenshots to support tickets, SOPs, or bug reports.
Auto-Redact (Pro)
When you capture a page, SnapFrame can scan the DOM on-device using heuristics (pattern matching and form-field signals — not AI) and highlight sensitive PII. From the Auto-redact panel in the editor, toggle masking for:
- Email addresses
- Phone numbers
- Social Security Numbers (SSN)
- Credit card numbers (including nested checkout iframes such as Stripe)
- Password fields
- Address fields
Once generated, you can click any automatic mask to resize, adjust, or delete it before exporting. Detection and masking run locally in your browser — the capture is never uploaded to a server to be redacted. Use the free manual blur, pixelate, or solid-box tools for anything the heuristics miss.
Manual Redact Tools
Select the Redact tool from the annotation toolbar, choose your style from the formatting panel, then drag across the area you want to hide:
- Blur Area: Apply a proportional blur to obscure elements smoothly.
- Mosaic Pixelate: Pixelate the target region for a standard documentation look.
- Solid Box: Overlay a solid color block (black, white, or themed) to hide information completely.
All manual and automatic redactions are saved as standard shapes, meaning you can move, resize, or delete them anytime before exporting. For Pro users, these edit states sync seamlessly across your devices in the Cloud Library.
Crop & Aspect Ratios
Trim your screenshot to a 16:9, 4:3, or unconstrained freeform selection using SnapFrame's free Crop tool with Smart Focus centering.
Crop Modes
| Mode | Aspect ratio | Best for |
|---|---|---|
| 16:9 | Widescreen | Presentations, blog hero images, YouTube thumbnails |
| 4:3 | Classic | Slide decks, documents, older display formats |
| Freeform | Unconstrained | Isolating any custom region with no ratio restrictions |
How to Crop Your Screenshot
- Click the Crop button in the top toolbar (the overlapping-corners icon). The Crop panel slides open on the right and a crop overlay appears on the canvas.
- Select 16:9, 4:3, or Freeform from the mode buttons at the top of the Crop panel. The crop box snaps to the chosen ratio automatically (Freeform starts unconstrained).
- Click anywhere on the image to instantly center the crop box on that point — this is the Smart Focus feature. SnapFrame re-centers the selection around your click without you having to manually drag the box into position.
- Drag any of the four corner handles on the crop box to resize it. In 16:9 or 4:3 mode, the ratio stays locked as you drag; in Freeform mode you can pull each corner independently.
- Click Apply Crop in the Crop panel to commit the selection. The canvas updates immediately with the cropped result. To discard your changes, click Cancel instead.
Caption Bar
Attach a styled caption bar showing a source label, custom text, and capture date — free with SnapFrame watermark, watermark-free on Pro.
How to Add a Caption
- Click the Caption button in the top toolbar (the speech-bubble icon). The Caption panel opens on the right side of the editor.
- Type a domain or app name in the Source Label field, such as
example.com. Leave it blank if you do not need attribution. - Type any note or headline in the Custom Text field. This is the main message of your caption bar.
- Check or uncheck Show Capture Date depending on whether you want the date visible. The toggle is on by default.
- Click Apply Caption. A styled bar is appended below your screenshot, and the canvas height expands to accommodate it.
Rounded Corners
Soften your screenshot with a corner radius from 0 to 100 px using a simple slider — free for all SnapFrame users. Export as PNG (Pro) for true transparency.
How to Apply Rounded Corners
- Click the Rounded Corners button in the top toolbar (the curved-corner arc icon). The Rounded Corners panel opens on the right.
- Move the Border Radius slider to the right to increase the corner radius. The live preview on the canvas updates as you drag, so you can see exactly how the corners will look. The range runs from 0 px (sharp square corners) to 100 px (heavily rounded).
- Click Apply to commit the rounded corners to the canvas. The corner areas of the image are clipped to reveal transparency behind the rounded shape.
Export & Sharing
Export Formats (PNG, JPG, WebP, PDF)
SnapFrame supports four export formats. JPG and WebP are free with unlimited exports; PNG and PDF are Pro features.
Supported Formats
| Format | Availability | Best for |
|---|---|---|
| JPG | Free — unlimited | Smaller file sizes and photographic content where transparency isn't needed |
| WebP | Free — unlimited | Modern web output with excellent compression and broad browser support |
| PNG | Pro only | Lossless, high-quality images with transparency — recommended when you've applied rounded corners |
| Pro only | Documents, printable reports, and shareable presentations |
How to Select a Format
The format dropdown sits in the top toolbar of the editor. Click it to reveal all four options and select the one you want before hitting Download or Copy. Free users default to JPG; Pro users default to PNG. Your selection is remembered for the current session.
Download & Filenames
Learn how to download your screenshot from the SnapFrame editor, understand auto-stamped filenames, and high-resolution output.
How to Download
- In the top toolbar of the editor, open the format dropdown and select JPG, WebP (free), or PNG / PDF (Pro only).
- Click the Download button in the top toolbar. SnapFrame renders your screenshot — including any crops, annotations, rounded corners, captions, or side-by-side comparisons you've applied — and saves the file.
Filenames and Output Quality
- Auto-stamped filenames — every file is saved as
SnapFrame-<timestamp>(for example,SnapFrame-2025-01-15T10-30-00.png), so your downloads never overwrite each other. - High-resolution output — SnapFrame renders at your device's pixel ratio, so on a Retina or HiDPI display your exported image is crisp and full resolution — not a scaled-down version of what you see on screen.
Free vs Pro Downloads
Free users can download unlimited JPG and WebP exports — there is no export counter or lifetime cap. PNG and PDF downloads require a Pro license.
Copy to Clipboard
Paste your edited screenshot directly into Slack, Figma, Google Docs, or any app — without saving a file first.
How to Copy
- In the editor top toolbar, select your export format from the dropdown.
- Click the Copy button next to Download. SnapFrame puts the image on your clipboard.
- Paste with
Ctrl+V(orCmd+Von Mac) in any app that accepts images.
Format by tier
- Free: copies as JPG or WebP (matching your selected format)
- Pro: copies as lossless PNG when PNG is selected
Side-by-Side Comparison (Pro)
Place your screenshot directly next to a second uploaded image for before/after or A/B comparisons using SnapFrame's Stitch tool — Pro only.
How to Create a Side-by-Side Comparison
- Click the Side-by-Side button in the top toolbar (the split-rectangle icon). If you are on Pro, the Stitch panel opens on the right. Your current capture is automatically placed as the left side of the comparison.
- In the Right side section of the panel, click Upload Image to Compare. Select a PNG, JPG, or WebP file from your device. A thumbnail preview appears once the image is loaded.
- Click Stitch & Compare. SnapFrame combines both images side by side into a single canvas. The combined image is now ready to annotate, export, or share.
Good Use Cases
| Scenario | Example |
|---|---|
| Before / after | Show a webpage before and after a redesign |
| Design iteration | Compare two versions of a UI mockup side by side |
| A/B comparison | Document two different layouts or copy variants |
| Bug vs. fix | Capture a broken state next to the resolved state |
| Competitive analysis | Place your product UI next to a competitor's for reference |
Integrations
Zendesk Ticket Attach (Pro)
Connect Zendesk with official OAuth, then attach the current capture to an existing ticket — no download-and-upload step. Pro only; requires a signed-in SnapFrame account.
Requirements
- An active SnapFrame Pro license
- A SnapFrame account (sign in from the Account & License panel)
- Access to a Zendesk subdomain where you can add ticket attachments
Connect Zendesk
- Open a capture in the SnapFrame editor.
- Click Integrations in the toolbar (Pro-gated).
- Enter your Zendesk subdomain — the part before
.zendesk.com(for example,yourcompany). - Click Connect Zendesk. Approve access in the Zendesk OAuth window.
- When the browser shows that Zendesk is connected, return to the SnapFrame editor. The Integrations panel should show your subdomain as connected.
Attach a screenshot to a ticket
- With Zendesk connected, open the capture you want to send.
- In the Integrations panel, enter the ticket number.
- Optionally add an internal note (comment on the ticket).
- Click Attach to Zendesk. SnapFrame uploads the current export to that ticket.
Disconnect
In the Integrations panel, click Disconnect Zendesk to revoke the connection on this SnapFrame account. You can reconnect later with the same OAuth flow.
Account & Licensing
Free vs Pro Comparison
Compare SnapFrame's free and Pro tiers side by side — see which features are available to everyone and what you unlock when you upgrade to Pro.
Feature Comparison
| Feature | Free | Pro |
|---|---|---|
| Exports | Unlimited JPG & WebP | Unlimited — all formats |
| PNG export | — | ✓ |
| Copy to clipboard | JPG / WebP | PNG (lossless) |
| Caption watermark | "Captured by SnapFrame" | Removed |
| PDF export | — | ✓ |
| Side-by-Side comparison | — | ✓ |
| Cloud Library (cross-device edit sync) | — | ✓ |
| Zendesk ticket attach (OAuth) | — | ✓ |
| Redact masking tools (blur, pixelate, solid box) | ✓ | ✓ |
| Auto-redact (on-device PII heuristics) | — | ✓ |
| Capture, crop, resize, annotate, rounded corners | ✓ | ✓ |
What's Always Free
The core editing experience in SnapFrame is completely free. You can use every capture mode (full page, visible area, draw region, element picker, workspace), crop and resize for any social or print format, add annotations, undo and redo, copy to clipboard, apply rounded corners, and build caption bars — all without a Pro license. JPG and WebP downloads are unlimited.
What Pro Unlocks
Upgrading to Pro gives you key upgrades on top of everything in the free tier:
- Auto-redact sensitive data — on-device heuristics detect and mask emails, phones, SSNs, credit cards, password fields, and address fields on capture.
- Lossless PNG export — download and copy at full quality with transparency support.
- PDF export — save your screenshot as a high-resolution PDF, ready for documents or presentations.
- Side-by-Side comparison — stitch your capture next to a second uploaded image for a before/after view.
- Cloud Library — optionally save captures and full edit state to the cloud (2 GB included) and resume editing on another device.
- Zendesk ticket attach — connect with OAuth and attach the current capture to an existing Zendesk ticket (SnapFrame account required).
- No caption watermark — caption bars show only your content; the "Captured by SnapFrame" branding is removed.
Pricing & Plans
SnapFrame Pro is available in three plans, so you can choose the commitment level that suits you best. All plans give you the same complete set of Pro features — unlimited exports, PDF output, Side-by-Side comparison, Zendesk attach, Cloud Library, and watermark-free captions. The only difference is how you pay.
Plans
| Plan | Price | Billing |
|---|---|---|
| Lifetime Access ⭐ Best Value | $59.99 | One-time payment — own it forever |
| Yearly | $29.99 | Billed once per year |
| Monthly | $2.99 | Billed every month |
How to Purchase
All checkout is handled securely by Paddle. Click the plan you want in the SnapFrame editor's Account & License panel, or visit the pricing page directly. You'll complete payment on Paddle's checkout where you can pay by card or any supported payment method.
After a successful purchase, Paddle triggers an automatic email with your license key (format: SF-XXXX-...).
After You Buy
- Find the license key in your purchase confirmation email from SnapFrame.
- Open the SnapFrame editor, click Account & License in the top toolbar, paste your key into the activation field, and click Activate Pro.
- Pro is active immediately. All features — PNG and PDF export, Side-by-Side comparison, Cloud Library, Zendesk attach, and no caption watermark — are unlocked.
Activate License Key
Step-by-step guide to entering your SnapFrame Pro license key in the editor, activating locally or via a cloud account, and deactivating when needed.
How to Activate
- Take a capture or open the Workspace. The editor opens in a new browser tab.
- Click the Account & License icon in the top toolbar of the editor. The Account & License panel slides open on the right side of the screen.
- In the Have a License Key? field, type or paste your license key (format:
SF-XXXX-...). - Click the Activate Pro button. SnapFrame sends your key to a secure backend for verification. If the key is valid, Pro is activated immediately and the panel updates to show your Pro status.
Deactivating Your License
Deactivating frees up your license slot on the current device, making it available for another machine.
- Click the Account & License icon in the editor toolbar.
- In the Pro status section, click Deactivate License. Confirm when prompted. Pro features are disabled on this device immediately.
Manage Devices
Understand SnapFrame Pro's 2-device limit, what happens when you exceed it, and how to reset, sign out, or switch active devices from the Account panel.
The 2-Device Limit
A single SnapFrame Pro license lets you run Pro features on up to 2 devices at the same time — for example, your work computer and your home computer. Device management is handled through your SnapFrame cloud account, so your session state is always accurate across machines.
When you sign in to your SnapFrame account, the device you're using is registered automatically. If you've already used up both slots, SnapFrame detects the conflict and shows you a Device Limit Exceeded notice instead of activating Pro on the new machine.
You won't lose any data — SnapFrame simply won't grant Pro access on the third device until you free up a slot.
What You Can Do When the Limit is Exceeded
The Device Limit Exceeded screen in the Account & License panel gives you three options:
- Reset Active Devices — Deregisters all currently active devices and registers the current machine as your primary device. Use this if you've lost access to one of your old devices.
- Log Out All Devices — Signs out all sessions across every registered device and clears all active slots. You can then sign back in cleanly on whichever device you want to use.
- Sign Out — Signs you out of the current device only, leaving the other active sessions unchanged.
How to Access Device Management
Device management is built into the Account & License panel in the editor:
- Take a capture or open the Workspace. The editor opens in a new browser tab.
- Click the Account & License icon in the top toolbar.
- If you are signed in and your device limit is exceeded, the Device Limit Exceeded screen appears with the options above. If you are within the limit, your Pro status and device info are shown in the panel.
Cloud Library (Pro)
Cloud Library lets Pro users save captures to secure cloud storage and open them on any signed-in device — with your full edit state restored, not just a flat image.
What gets saved
Each cloud save includes:
- The base capture image
- All annotations (pen, shapes, text, blur)
- Crop, social resize, rounded corners, and caption bar settings
- Side-by-side stitch layout, if configured
When you open a cloud item on another machine, the editor loads exactly where you left off.
Requirements
- An active SnapFrame Pro license
- A SnapFrame account (sign in from the Account & License panel)
- Your license linked to your account
Pro features like PDF export, comparison stitch, and watermark removal work without an account. Cloud Library and Zendesk ticket attach require sign-in.
Storage limits
- 2 GB total storage per account (included with Pro)
- 25 MB maximum per individual save — crop large captures before saving if needed
How to use Cloud Library
- Open the editor and click Account & License in the toolbar.
- Sign in or create an account, then activate your Pro license if you haven't already.
- Open the Cloud Library panel from the toolbar.
- Click Save to Cloud to upload your current capture and edit state.
- On another device, sign in to the same account and click Open on any saved item.
Help & Troubleshooting
Common Issues & Troubleshooting
Solutions to the most common SnapFrame problems, from restricted-page errors and export limits to post-update failures and license issues.
This page cannot be captured error
SnapFrame cannot capture internal browser pages or the Chrome Web Store. The following URL types are always blocked:
chrome://pages (e.g. Settings, Extensions, New Tab)chrome-extension://pagesedge://pagesabout:pages (e.g.about:blank)- The Chrome Web Store (
chromewebstore.google.com)
Solution: Navigate to any regular website (for example, https://example.com) and try again. If you need to document a browser UI, take a screenshot using your operating system's built-in screenshot tool instead.
PNG or PDF export locked
On the free tier, PNG and PDF export are Pro features. Selecting either format shows an upgrade prompt instead of downloading.
Solution: Export as JPG or WebP for unlimited free downloads, or upgrade to Pro for lossless PNG and PDF. You can also use Copy to clipboard to paste JPG/WebP into other apps without downloading.
Screenshot is cut off or incomplete
Some modern web apps — particularly single-page applications like chat tools, dashboards, and social feeds — use an inner scroll container rather than the main page scroll. SnapFrame detects these containers automatically, but very complex layouts can occasionally result in a capture that misses content below the fold.
Solution: Try the following steps in order:
- Scroll down through the page content manually before capturing, so the content has a chance to load.
- Reload the page and capture again immediately without scrolling.
- If the page uses infinite scroll, consider using the Element Picker mode to capture a specific section instead.
Extension not responding after a Chrome update
Chrome updates occasionally interrupt extensions that are already loaded in memory, which can leave SnapFrame in a broken state until it is reloaded.
Solution: Try these steps in order, testing after each one:
- Open
chrome://extensions, find SnapFrame, and toggle it off then back on. - Close all Chrome windows and relaunch Chrome.
- If the issue persists, click Remove on the SnapFrame entry in
chrome://extensions, then reinstall it from the Chrome Web Store.
License key not activating
If you enter your license key and see a verification error, the most common causes are:
- A typo or extra space in the key — copy and paste directly from your purchase confirmation email.
- No internet connection — key verification requires a live connection to SnapFrame's licensing server.
- The key is already active on 2 devices (the Pro plan limit). You can manage your active devices in Account & License.
Solution: Double-check the key, ensure you are connected to the internet, and try again. If the problem continues, contact support with your purchase confirmation and we will resolve it for you.
FAQ
Is SnapFrame free?
Yes. SnapFrame is free to install and includes every capture mode and editing tool. On the free tier you get unlimited JPG and WebP exports plus copy-to-clipboard. PNG and PDF export require Pro.
SnapFrame Pro unlocks lossless PNG export, PDF export, removes the "Captured by SnapFrame" watermark from the Caption tool, adds Side-by-Side (Stitch) comparisons, and enables Cloud Library sync.
How do I upgrade to Pro?
You can upgrade in two steps:
- Visit the pricing page and choose the plan that suits you — Lifetime Access ($59.99 one-time), Yearly ($29.99/yr), or Monthly ($2.99/mo). You'll receive a license key in your purchase confirmation email.
- Open the SnapFrame editor, click the Account & License tool in the sidebar, and enter your license key. Your Pro status is tied to your license key and can be synced to a SnapFrame account so it follows you across devices.
Can I use SnapFrame on multiple computers?
Yes. SnapFrame Pro supports up to 2 concurrent devices — for example, your work machine and your home laptop.
If you exceed the device limit, you can manage your active devices (including resetting or removing a device) in the Account & License panel.
Does SnapFrame work on all websites?
SnapFrame works on virtually all websites, including single-page applications, dashboards, and pages with sticky headers or infinite scroll.
The only pages it cannot capture are restricted browser pages: chrome:// pages (Settings, New Tab, Extensions, etc.), chrome-extension:// pages, edge:// pages, about: pages, and the Chrome Web Store.
What are the capture shortcuts?
SnapFrame has three capture shortcuts that work on any non-restricted page — no popup required:
Alt+S(Option+Son Mac) — full-page capture with auto-scroll and stitchAlt+V(Option+Von Mac) — visible viewport only, no scrollingAlt+R(Option+Ron Mac) — draw a region rectangle to capture
Rebind any shortcut at chrome://extensions/shortcuts. Shortcuts do not fire on chrome://, edge://, about:, or Chrome Web Store pages.
What file formats can I export in?
Free: unlimited JPG and WebP downloads, plus copy-to-clipboard in those formats.
Pro: adds lossless PNG and high-fidelity PDF export, plus PNG clipboard copy.
All exports are high-resolution (rendered at your display's device pixel ratio) and saved with the filename SnapFrame-<timestamp>.
Does SnapFrame upload my screenshots anywhere?
By default, no. SnapFrame processes and stores captures locally in your browser. Your screenshots are not uploaded unless you explicitly use Save to Cloud (a Pro feature).
Network requests SnapFrame may make:
- License key verification when you activate Pro
- Account sign-in and device management (optional)
- Cloud Library upload/download when you choose to save or open a cloud item (Pro only)
Can I undo edits in the editor?
Yes. Press Ctrl+Z (or Cmd+Z on Mac) at any point in the editor to step back through your changes. SnapFrame keeps up to 50 undo steps in history, covering annotations, crops, caption changes, rounded corners, and more.
Contact Us
Still need help, found a bug, or have a question about your license? We're happy to assist.
Email us at hello@getsnapframe.online and we'll get back to you as soon as we can. When contacting us about a purchase or license issue, please include your purchase confirmation so we can resolve it quickly.
Stop tab-hopping for one screenshot
Capture, redact, and document — all in your browser, all in SnapFrame.
Start free. No account, no card, no catch.
Social Resizer
Reframe any screenshot to the exact aspect ratio for Instagram, TikTok, LinkedIn, print, email, and more with a smart focal point.
How to Use the Social Resizer
Available Presets
Instagram: Square Post (1:1), Portrait Post (4:5), Landscape (1.91:1), Stories / Reels (9:16)
TikTok: Photo Mode (9:16)
Facebook: Feed (Square) (1:1), Feed (Wide) (1.91:1), Stories (9:16), Cover Photo (16:9)
X / Twitter: Feed (Square) (1:1), Feed (Wide) (16:9), Portrait (4:5), Vertical (3:4)
LinkedIn: Post (Square) (1:1), Post (Portrait) (4:5)
Pinterest: Standard Pin (2:3), Idea Pin (9:16)
Threads: Post (Square) (1:1), Post (Portrait) (4:5)
Snapchat: Snaps (9:16)
YouTube: Thumbnail (16:9)
Print: A4 Portrait (210 × 297 mm), US Letter (8.5 × 11 in), Business Card (3.5 × 2 in)
Email Marketing: Email Header (600 × 200 px), Email Banner (600 × 300 px)